Oatmeal Caramel Bars
May 25, 2011 at 8:38 pm | Posted in Uncategorized | 1 Comment
I had a Junior League get together this week and I wanted to make something a little different for dessert. I had made the Pillsbury recipe for Oatmeal Carmelitas in law school, and this is very similar, except you melt the caramels at home instead of using store bought caramel sauce. This is pretty easy and could be modified to suit your taste with the addition of nuts or coconut.
Even just as this basic version, they were pretty yummy, and I got a request to add them to the blog, so here you go!
You will need:
a bag of ~40 individually wrapped caramels, unwrapped
6 tablespoons heavy cream
2 cups all-purpose flour
2 cups quick oats
1 1/2 cups brown sugar
1 teaspoon baking soda
1/2 teaspoon salt
3 sticks of butter, melted
1 cup semisweet chocolate chips (I used mini chips)
1. Preheat the oven to 350 degrees.
2. In a medium saucepan over low heat, melt together the caramels and heavy cream, stirring occasionally until smooth.

3. Stir together the flour, oats, brown sugar, baking soda and salt. Stir in the melted butter until well blended. Press half of the mixture into the bottom of a 9×13 inch baking pan. Reserve the rest.

4. Bake the crust for 8 minutes in the preheated oven. Remove and sprinkle with chocolate chips.

5. Pour the caramel mixture over the top, and swirl the chocolate in with a spoon.

6. Crumble the remaining crust mixture over top of the caramel and chocolate.

7. Return to the oven and bake for an additional 15 minutes, or until the top is lightly toasted.

8. Cut into squares while it is still warm.

Can chicken put a ring on it?
May 12, 2011 at 8:03 pm | Posted in Uncategorized | Leave a commentLast month, Glamour Magazine released their new cookbook, “100 Recipes Every Woman Should Know: Engagement Chicken and 99 Other Fabulous Dishes to Get You Everything You Want in Life.” Chicken so good that it turns boyfriends into fiancés. What decade is this?!?
Horrifying, right? I was so horrified that I had to try it out for myself, right away. And evidently, this is something that a lot of people know about – check out these google search results. Women everywhere – I am so disappointed in us.

This recipe was pretty good. It’s certainly better than Dying Alone Porkchops. I don’t even really liked cooked onions, and these onions were seriously one of the most delicious things I have ever eaten. Now you can try this too!
Here’s what you’ll need:
- 1 5 pound roasting chicken
- salt and freshly ground black pepper
- 2 lemons
- 1 whole head garlic, peeled
- Good olive oil
- 2 Spanish onions, peeled and thickly sliced (just big old white onions!)
- 1/2 cup dry white wine
- 1/2 cup chicken stock
- 1 tablespoon all-purpose flour
Preheat the oven to 425 degrees.
Remove and discard the chicken giblets. Pat the outside dry. Liberally salt and pepper the inside of the chicken. Cut the lemons in eighths, place one lemon in the chicken along with the garlic and reserve the rest of the lemon slices. Brush the outside of the chicken with olive oil and sprinkle the chicken liberally with salt and pepper.

Tie the legs together with kitchen string and tuck the wing tips under the body of the chicken.

Place the chicken in a small roasting pan. (If the pan is too large, the onions will burn.) Place the reserved lemons and the sliced onions in a large bowl and toss with 2 tablespoons of olive oil, 1 teaspoon of salt, and 1/2 teaspoon of pepper. Pour the mixture around the chicken in the pan.

Roast the chicken for about 1 hour and 15 minutes, until the juices run clear when you cut between a leg and a thigh.

Add the drippings to a saucepan and turn the heat to medium-high. Add the wine and stir with a wooden spoon to scrape up the brown bits. Add the stock and sprinkle on the flour, stirring constantly for a minute, until the sauce thickens. Add any juices that collect under the chicken. (this is called the “marry me” juice)

Carve the chicken onto a platter and serve with the lemons, onions, and warm sauce.

Do you think we enjoyed it??

(Result? Matt said it was good, but not the best thing I’ve ever made. )
Diaper Cake
March 19, 2011 at 10:14 am | Posted in Uncategorized | 8 Comments
I told a few folks that I was going to be making a diaper cake for my friend’s upcoming baby shower. Evidently, the diaper cake phenomenon has not spread amongst my social circle because most people’s reactions indicated that they thought such a cake would be edible, not to mention incredibly unappetizing.
But now that they understand the concept, I think everyone agrees a diaper cake is the perfect baby shower accessory… and not all that difficult to put together! To make a 4 tier cake like mine, you’ll need 4 pans – a 12 inch, a 10 inch, an 8 inch, and a 6 inch.
Start by fanning out the diapers in your largest pan:

Continue filling with diapers until they are pushed firmly against the edges (meaning you can’t force any more diapers into the layer. Tie a ribbon (or use a rubber band) around the outside of the layer, and flip the pan over onto your base.

Remove the pan (gently) and you have your first layer finished!

Repeat with all your remaining layers until you have a beautiful, plain white diaper cake.

I kept the layers together with a plain white wire clothes hanger, bent straight. To use tape or glue would make the diapers unusable for the mommy-to-be.

And then decorate however you like! If you search the web, you’ll find tons of extremely decorated diaper cakes. Most of them are covered in baby toys and baby goodies, but I went pretty basic.

Serve with cupcakes so you don’t disappoint those who are expecting an edible diaper cake!

Go Ask Alice – How to Melt Chocolate
March 8, 2011 at 8:29 pm | Posted in Uncategorized | Leave a commentReceived a question from a blog reader tonight that I thought was worthy of sharing with y’all. The reader is having trouble with melting chocolate for dipping the truffles – the chocolate is seizing up and not smooth.
So here’s your answer:
Chocolate is very finicky – and white chocolate is the worst. I have ruined many batches of chocolate when I get impatient and try to melt it too quickly. There are two key components to getting smooth melted chocolate. The first is the type of chocolate, and the second is method of melting.
Type!
I use the Baker’s semi-sweet baking chocolate squares and white chocolate bars. This type of chocolate melts more easily and evenly than chocolate chips, for example. Chocolate chips have stabilizers in them (like wax!) which make for less that perfect melting, which would be a problem if you’re trying to get a smooth dipping chocolate. This is VERY important when using white chocolate as white chocolate has a high cocoa butter content – which means the chocolate can seize easily, resulting in a lumpy, ruined mess. The baking squares melt better than the chips, and if you are near a craft store, they sell chocolate wafers which are designed for candy making and almost impossible to screw up (I don’t like their flavor as well – but they really do melt perfectly.)
Method!
The key step in melting chocolate is patience. Always remember to melt them over a double boiler or if you use a microwave like me, cook the chocolate in short, low power intervals (I use 50%) of no more than 30 seconds. You will near to stir at each interval. Other pointers – avoid any and all contact with water, as this will also cause the chocolate to seize up. And once the chocolate has turned, there’s no going back. Throw it out, get a new bowl, and start over.
Lundi Gras Red Beans and Rice!
March 7, 2011 at 9:18 pm | Posted in Uncategorized | 2 Comments
With Mardi Gras tomorrow and a trip to New Orleans on the horizon, I wanted to make red beans and rice for our Monday night dinner.
Red beans and rice is traditional creole dish traditionally made on Mondays with red beans, veggies, spices, and pork bones as left over from Sunday dinner – an old custom from the time when ham was a Sunday meal and Monday was washday, as a pot of beans could sit on the stove and simmer while the women were busy scrubbing clothes.
BUT given that we didn’t have a ham dinner yesterday and I had to make this after I got home from work today, I made the following simplified version, which still kept me in the “holiday” spirit! I hope you will enjoy it too.
What you’ll need:
2 cups uncooked white rice, prepared as you like
1 (16 ounce) package turkey kielbasa, cut into 1/4 inch slices
1 white onion, chopped
1 green bell pepper, chopped
1 clove chopped garlic
2 (15 ounce) cans canned kidney beans, drained (I used one can of dark and one can of light)
1 (16 ounce) can peeled tomatoes, chopped
1/2 teaspoon dried oregano
salt to taste
1/2 teaspoon pepper
cajun seasoning to taste
Directions:
First, make the rice to your liking so that can cook while you’re prepping your veggies and starting on the red beans. Chop up your green pepper, onions, and kielbasa.

Now, once you’ve got all your ingredients ready to go, in a large skillet over low heat, cook sausage for 5 minutes. Stir in onion, green pepper and garlic; saute until tender.

Pour in beans and tomatoes with juice. Season with oregano, salt and pepper.

Simmer uncovered for 20 minutes.
You may decide you want to add some water or milk, depending on how thick you’d like the consistency. I added about a half cup of each.

Serve over rice.

Pretzel Turtles
March 6, 2011 at 2:54 pm | Posted in Uncategorized | Leave a comment
There couldn’t be an easier candy/dessert to make than these pretzel turtles. They’re so easy, it’s embarrassing, but they’re yummy, especially if you are a sweet and salty person.
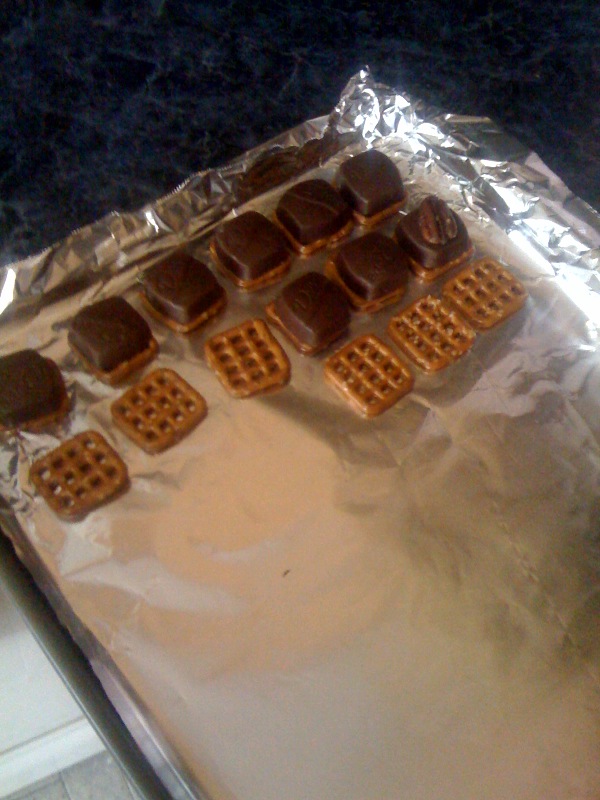
All you need is some caramel filled chocolates – Rolos would work, but I used Dove Promises, some small pretzels, some whole pecans, and some white chocolate to drizzle over top. You don’t even need the white chocolate.
First, unwrap your chocolates. Preheat your oven to 300.
Next, lay out your pretzels. Top them with the chocolates.
1")
Next, top with the pecans.
1")
Pop them in the oven for about 4 minutes.
Pull them out and gently press the pecans down into the chocolates. Some caramel will run out, and that’s okay!
1")
Drizzle with melted white chocolate and cool!
")
And you’re done!

Incredible Turkey Meatloaf
February 23, 2011 at 10:38 pm | Posted in Uncategorized | 3 Comments
Tonight for dinner we had some yummy turkey meatloaf. To be honest, I haven’t made meatloaf in a long time, and although I was in the mood for it tonight, I wanted to make something a little more healthy. I honestly did not have high hopes for this recipe, and when I took my first bite, I was more than pleasantly surprised – it was delicious, and I would definitely make this again! Now you can make it too.
You’ll need:
1 cup milk
1 cup Italian bread crumbs
2 eggs
1 teaspoon minced garlic
1 cup shredded sharp cheddar


Blueberry Crisp Bars
February 22, 2011 at 10:46 pm | Posted in Uncategorized | 2 Comments
These bars are a versatile treat – you can serve them for dessert or breakfast! They taste like a little bite of blueberry pie!
Here’s what you’ll need:
1 cup white sugar
1 teaspoon baking powder
3 cups all-purpose flour
1 cup butter
1 egg
1 pinch ground cinnamon
4 cups blueberries
1/2 cup white sugar
3 teaspoons cornstarch
Preheat the oven to 375 degrees, and grease a 9×13 inch pan
In a medium bowl, stir together 1 cup sugar, 3 cups flour, cinnamon and baking powder. Use a fork, blend in the butter and egg – the dough will be crumbly.

Pat half of dough into the prepared pan.
In another bowl, stir together the sugar and cornstarch. Gently mix in the blueberries. Sprinkle the blueberry mixture evenly over the crust.

Crumble remaining dough over the berry layer.

Bake in preheated oven for 45 minutes, or until top is slightly brown.

Cool completely before cutting into squares. Seriously, completely, or you will have a runny mess on your hands!

Yum!
Best Ribs Ever
February 21, 2011 at 3:57 pm | Posted in Uncategorized | 1 Comment
Best ribs ever. That’s bold, I know. But I mean, these really are the best ribs. I honestly don’t even really like ribs, and these ribs are to die for. Look here – no meat on the bones – it just falls off!!

You can make these too, and you will definitely be getting requests for the recipe!
All you need is baby back ribs, some rub seasoning (whatever kind you like), 1 cup of liquid smoke (usually two bottles), and water.
Score the back of the ribs.

Season the rib with a 1/8 cup of seasoning on each side. It might get a little messy.

In a shallow pan mix 1/2 cup of liquid smoke and 2 1/2 cups of water.
Place the rib into a shallow pan with a drain grate inside. The grate will keep the rib from sitting in the liquid smoke. Wrap the top of the pan with about three layers of aluminum foil. Make sure you wrap it tightly because you are basically steaming the ribs. Cook at 275 degrees for 5 hours.

Now you can cool the ribs for future use, or you can throw them on the grill. I like the cut them into smaller, more manageable pieces for grillings.

Sauce them on one side and throw them on the grill.

Grill for about 5 minutes, then sauce the other side and flip them over. Grill the other side for about 5 minutes. You might lose a few bones through the grill grates – they are that tender!

Now you’re ready to serve!
Potato Chip Chicken
February 9, 2011 at 8:13 pm | Posted in Uncategorized | Leave a commentOnce upon a time, I was going to make Michael Chiarello’s Chicken alla Vendemia, an elaborate chicken recipe with fennel seeds and grapes.
But then I got stuck working late, and by the time I got to the grocery store, I knew it was too late to make anything that elaborate. So on the way home, I had been thinking about what ingredients we had at home that I wanted to use up, and I remembered that I had just opened a bag of cheddar sour cream potato chips that would surely go bad before I could finish the bag (ha ha, suuuure).
So I picked up some chicken breasts (which I cut into strips), dipped them in melted butter, and rolled the chicken in the crushed potato chips! Not amazing, but pretty good and leaves open lots of room for your own variations!
Ingredients:
- chicken breasts
- melted butter
- 1-2 cups of crushed potato chips, any flavor

Dip the chicken into the melted butter, then coat in the crushed potato chips.

Bake at 350 for about 25 minutes.
Serve! I did serve a green vegetable, but this is Matt’s plate, so don’t judge me!

Create a free website or blog at WordPress.com.
Entries and comments feeds.
